With a VPN, you can visit sites with restricted access, which can be an appropriate solution for those who don’t want to be tracked. There are many VPN services on the market and most of them have applications for desktop and mobile, but in Windows 11 there is a solution natively, without the need for third parties. Typically VPN services provide an app to connect to, but you might still want to set up the VPN manually if the app isn’t working. For that, Windows 11 offers an option to set up and manage VPN connections and you can use it to connect to virtually any VPN service. Check this article for a step-by-step how to configure a VPN in Windows 11.
How does VPN work?
VPN allows a computer to send and receive data over shared or public networks, with all the functionality, security, and management policies of a private network. Once connected to a VPN, your Internet traffic is transmitted through an “encrypted tunnel” between your computer or cell phone and the VPN provider’s servers. A VPN lets you access content restricted to specific regions, like watching Netflix Canada, for example, quite easily. The reasons for using a VPN with Windows 11 are the most basic: to increase your security and privacy in your browsing. It is a fact that there are many myths about the use of the famous VPNs, such as: “VPNs are only for professional users” or “Only those who need to hide illegal activities need a VPN.” However, these are just myths; you can use them whenever and however you like.
How to set up a VPN on Windows 11?
Most VPN services have their own apps to create VPNs automatically. However, you can configure it manually if necessary. In Windows 11, you need to configure it manually in a few minutes, which can be used through 2 methods, check below.
Method 1: Windows 11 Settings
In this method, you will configure your VPN through the traditional Windows settings menu and this can be a faster way of doing the whole process.
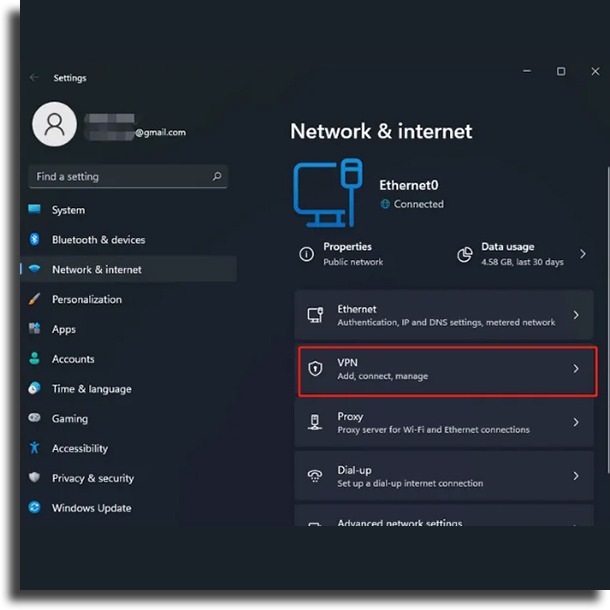
Right-click on the network icon in the lower right corner of the monitor in the taskbar and select Network and Internet Settings and this will take you to the Network and Internet tab in Windows Settings.
In that section of options on the right-hand side, find and choose VPN.
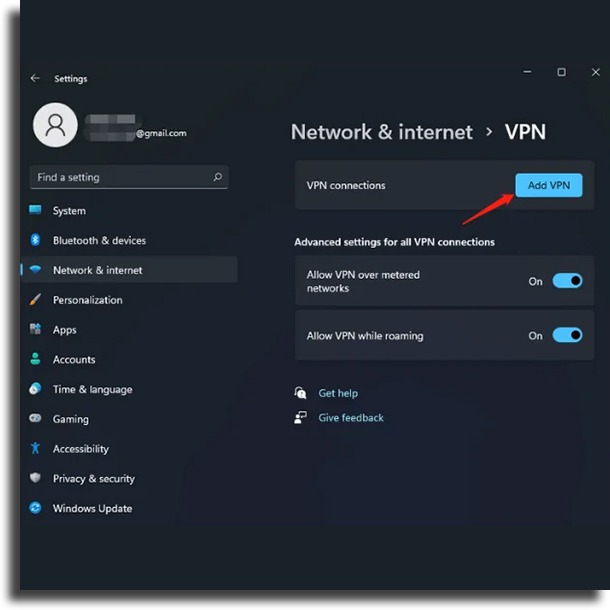
Click the blue Add VPN button.
You will see a pop-up screen to specify the following parameters.
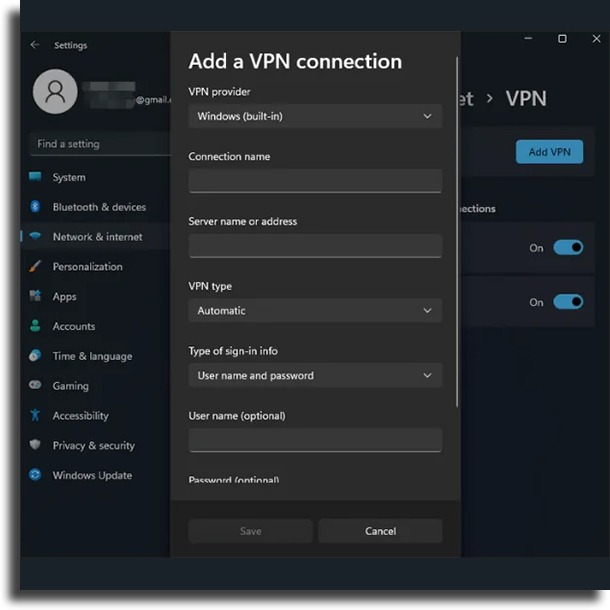
VPN Provider: The default selection is Windows (built-in). Connection Name: It is the name used to identify the VPN and you can rename it as you wish. Server name or address: Enter your VPN server address, such as vpnserver.com or 122.122.122.122. VPN Type: If you know exactly what type of VPN you want to use, you can specify it to have a faster browsing speed, otherwise leave it as the default Automatic. Type of login information: If it’s a free connection without any username or password, you can leave the rest of the boxes blank, but if you have a username and password, just enter them in the boxes below, or use a smart card.
- After successfully completing the VPN setup, check if it is listed under VPN connections. Finally, click Connect to connect your computer to the configured VPN, another way is through the taskbar.
Method 2: Network and Sharing Center
In the second method on how to set up a VPN on Windows 11, you will configure it through traditional Windows screens.
Click the Start menu in the center of the taskbar and select Settings.
Under Settings, choose Network & Internet in the left pane.
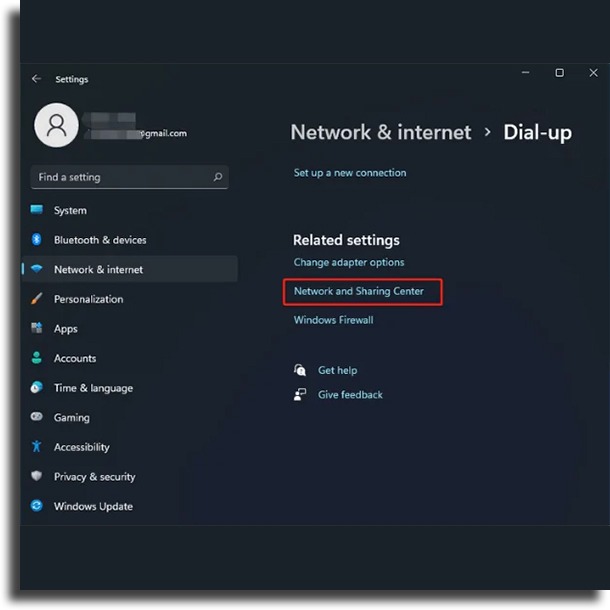
Move to the right, scroll down to find, and click on the Dial-up option.
On the next screen, choose Network and Sharing Center.
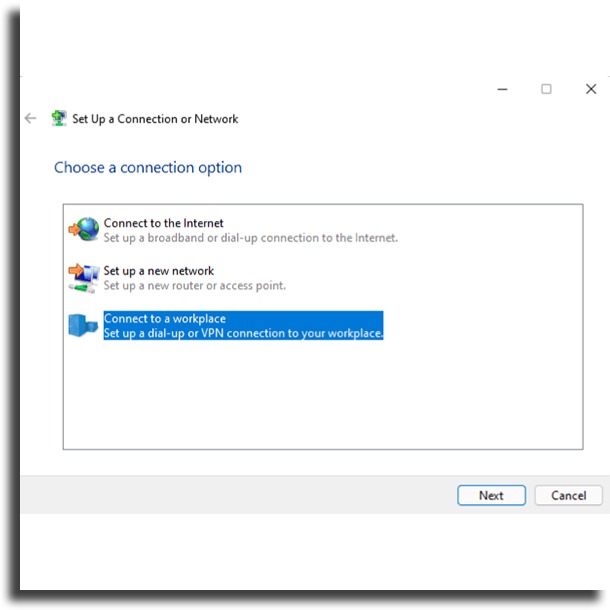
In Network and Sharing Center, click Set up a new connection or network.
In the window that opens, choose a connection option and select Connect to a workplace to set up a dial-up or VPN connection to your workplace.
Click Use my Internet connection (VPN).
You will then be asked for the Internet address (IP address or IP name) and the destination name (this can be the same as the Internet address).
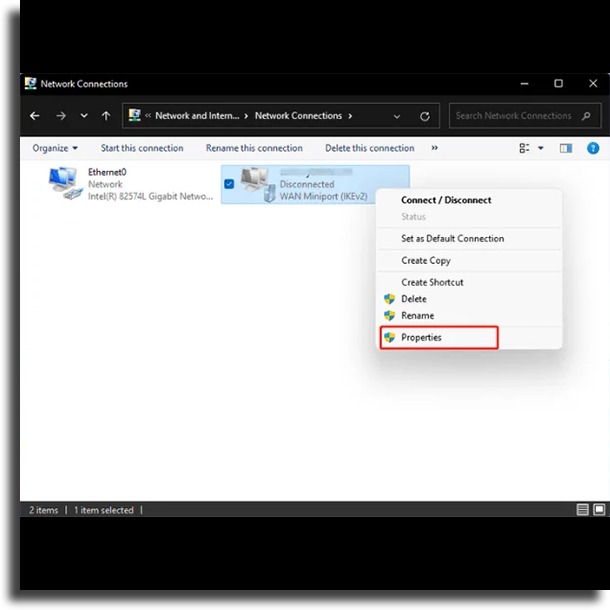
Go back to select Change adapter settings from the left menu in Network and Sharing Center.
Right-click and choose Properties on the VPN that was recently added
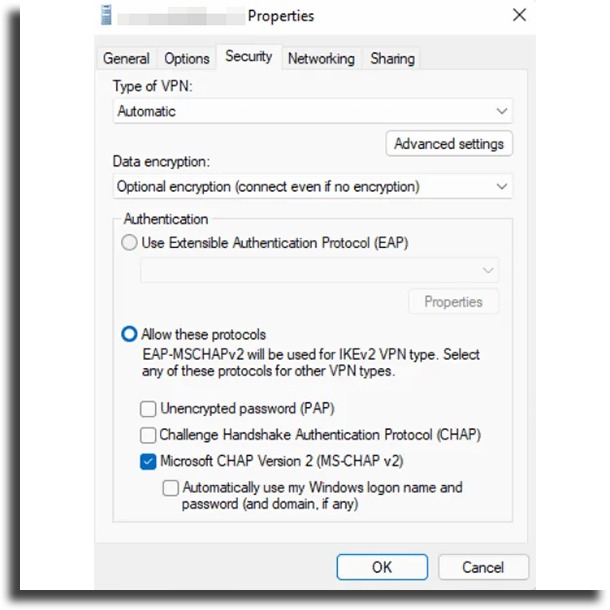
In the VPN Connection Properties window, click the Security tab.
On this tab, you can customize the VPN type and enable Microsoft CHAP Version 2 (MS-CHAP v2) in Allow these options.
Switch to the Network tab, select Internet Protocol Version 4 (TCP / IPv4), and click the Properties button..
In the Internet Protocol version 4 (TCP / IPv4) Properties window, select Use the following DNS server addresses and enter your preferred DNS server address.
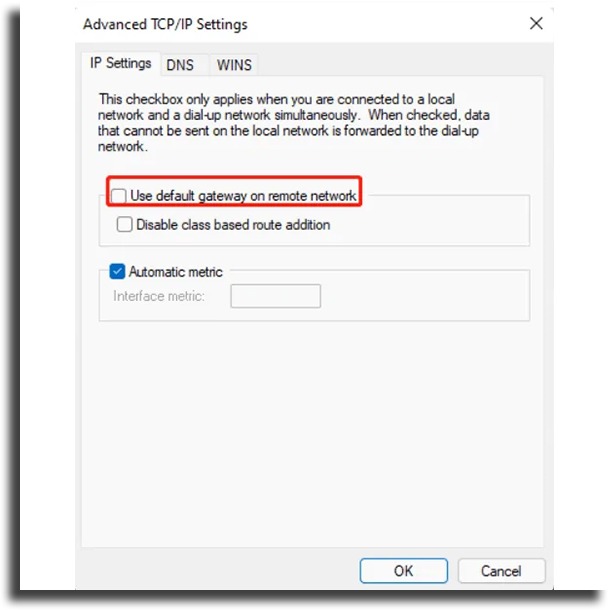
If you don’t want all your network connections through VPN, just click the Advanced button in the DNS server settings and uncheck Use default gateway on a remote network.
Click all the OK buttons on the open windows to save the changes made. You have now set up Windows 11 VPN and it is available for connection. Just enter your username and password to connect to the new VPN.
Did you like to know how to set up a VPN on Windows 11?
Did you like our guide on how to set up a VPN in Windows 11? So leave a comment telling us what you think and if you have any questions.